This checklist outlines your Macola® 10 & ES software year-end processing workflow steps. The checklist procedures are identical for calendar year and fiscal year companies. To assure consistency, we suggest that one person or a small team complete the checklist. Please call us with any questions and comments.
Leahy Consulting Assistance Desk (513) 723-8094
Preparation Steps
1. Read all of the following steps in each section before starting.
2. Periodically run utilities to help maintain data integrity:
- Run File Validations
- Run Reset Allocations and run Reset Quantities On-Order
- Run Reset Low Level codes
- Run Rebuild OE Inquiry Order Tables
- Run Rebuild Batch ID’s
3. Frequently backup your Macola® database.
4. Frequently archive your Macola® database data.
- Update your archiving plan frequently to support your retention policies.
Informational Steps
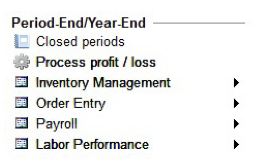
- Go to System > Period End/Year-End submenu
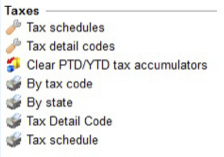
- Go to General Ledger > Taxes submenu
2. The Year-end checklist steps should be performed immediately AFTER completing the Period-end checklist steps for the LAST period of your accounting year.
3. The Year-end checklist sequence should be followed as described due to the data interactions and/or dependencies between multiple Macola® modules.
4. All users must exit Macola® prior to executing the Year-end checklist.
5. BACKUP your Macola® database prior to executing the Year-end checklist.
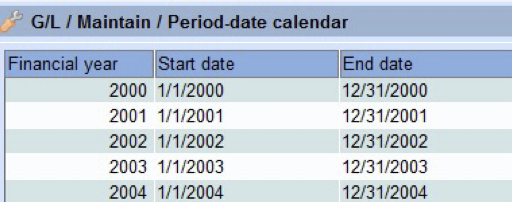
Period-Date Calendar
Confirm that your period-date calendar includes the new year.
1. Navigation: Go to General Ledger menu > Maintain > Period-Date calendar.
2. Highlight the coming year and click Open.
3. If the coming year is not listed, create one for the coming year.
Confirm that your journals are open for the new year.
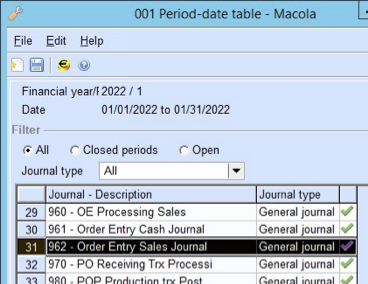
The following instructions will be used for confirming that the needed journal(s) for each module are open in the coming year and the period is set to “1”. This will apply to Sales Order Entry, Accounts Receivable, Production, Manufacturing Cost Accounting, etc.:
1. Go to General Ledger menu > Maintain > Period-Date Calendar.
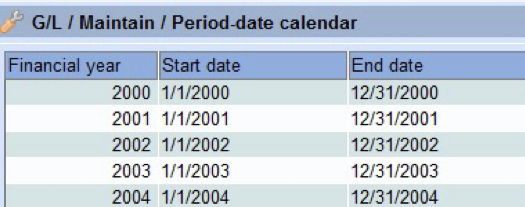
2. Highlight the coming year > click Open.
3. Highlight period “1” and click the closed quantity field to open that period.
4. Specify “All” for the filter and highlight the needed source journal(s).
5. Double click to change the “X” to a “check mark” and click SAVE
Sales Order Entry Year-end Checklist
Sales Order Entry/CM/RMA/Cash Steps:
1. Complete Period-end Checklist.
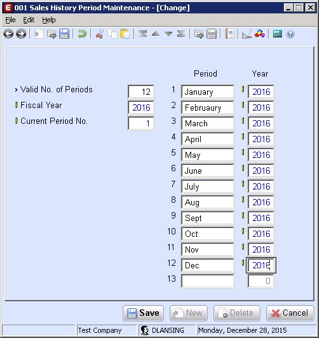
2. Confirm the Order Entry Sales History period date file is set to the new year and reflects “1” as the current period.
- Go to System Menu > Distribution > Order Entry > Sales History Periods > change to reflect the coming year > current period “1” > click save.
3. Confirm that your Order Entry Journal(s) are OPEN for the new year period “1”. Refer to the instructions above.
Accounts Receivable Year-end Checklist
Accounts Receivable Sales Order/CM/DM steps:
1. Complete Period-end Checklist.
2. Confirm that your Accounts Receivable Journal(s) are OPEN for the new year period “1”. Refer to the instructions above.
Production (POP / SF / SC / MRP / SR / MS) Year-end Checklist
Production Steps
1. Complete Period-end Checklist.
2. Confirm that your Production Journal(s) are OPEN for the new year period “1”. Refer to the instructions above.
Labor Performance Year-end Checklist
Labor Performance Steps
1. Complete Period-end Checklist.
2. Clear accumulators.
3. Go to System > Period End/Year End > Labor Performance > Clear Accumulators
Manufacturing Cost Accounting (MCA) Year-end Checklist
Manufacturing Cost Accounting Steps:
1. Complete Period-end Checklist.
2. Confirm that your MCA Journal(s) are OPEN for the new year period “1”. Refer to the instructions above.
Purchase Order Year-end Checklist
Purchase Order Steps:
1. Complete Period-end Checklist.
2. Confirm that your Purchase Order Journal(s) are OPEN for the new year period “1”. Refer to the instructions above.
Assets and Depreciation Year-end Checklist
Assets and Depreciation Steps:
1. Complete Period-end Checklist including posting depreciation.
2. Print Assets Year-end Totals report
- Go to Assets > Reports > Assets Year-end Totals
3. Confirm that your Assets and Depreciation Journal(s) are OPEN for the new year period “1”. Refer to the instructions above.
Inventory Management (BOM / IM) Year-end Checklist
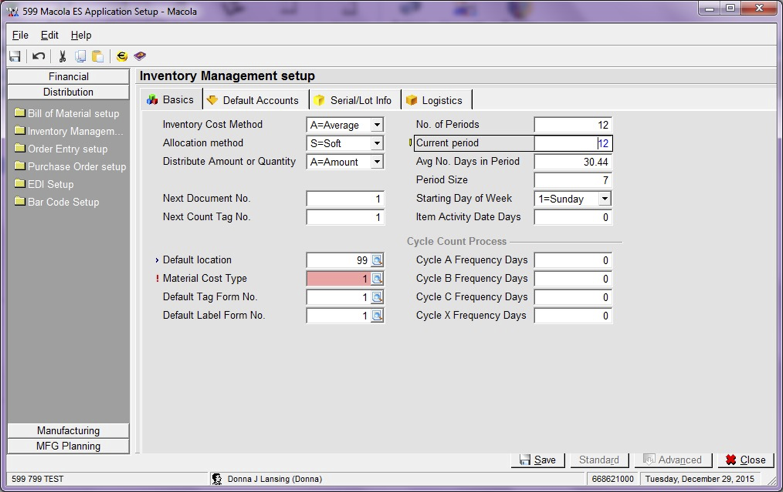
- Go to System Menu > Package Settings > Distribution > Inventory Management.
- Confirm that the “Current Period” field in I/M Package Settings is accurate. If not, the Item Period History Report will be inaccurate. If this number is not “12 and/or your year-end period”, then update it to the year-end period. If it is off, your item Period History report is compromised for this and prior periods.
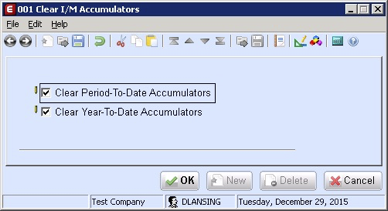
3. Clear accumulators
- Go to System > Period End/Year End > Inventory Management > Clear Accumulators.
- Specify the “Clear Year-To-Date Accumulators” option. Choosing this option also selects to “Clear Period-To-Date Accumulators”.
- This process should only be run ONCE. If you ran this process during your period-end checklist steps, DO NOT run again at this time.
4. Confirm that your Inventory Management Journal(s) are OPEN for the new year period “1”. Refer to the instructions above.
Accounts Payable Year-end Checklist
Accounts Payable Year-end Steps:
1. Complete Period-end Checklist
2. 1099s – this does NOT need to be completed as part of your year-end processing.
- The Print 1099 Forms screen allows you to print 1099 forms.
- The Create 1099 Forms screen allows you to create electronic files.
- The Print 1099 Forms screen and the Create 1099 Forms screen have a Recalculate Vendor YTD Payment check box.
- If you select the Recalculate Vendor YTD Payment check box, the system automatically clears the value in Number Field 1 for vendors in the selected range and recalculates the 1099 value based on 1099 designated transactions for the designated year. You should select this check box when creating 1099 forms for a new year. This functionality allows you to generate 1099 forms without manually clearing Number Field 1 for each vendor.
- If you do not select the Recalculate Vendor YTD Payment check box, the system will generate 1099 forms based on the values in Number Field 1. This is useful when reprinting 1099s or when you have manually changed the 1099 value in Number Field 1 for a vendor.
3. Confirm that your Accounts Payable Journal(s) are OPEN for the new year period “1”. Refer to the instructions above.
Cash Flow Year-end Checklist
Cash Flow Steps:
1. Complete Period-end Checklist.
2. Complete Bank Reconciliations
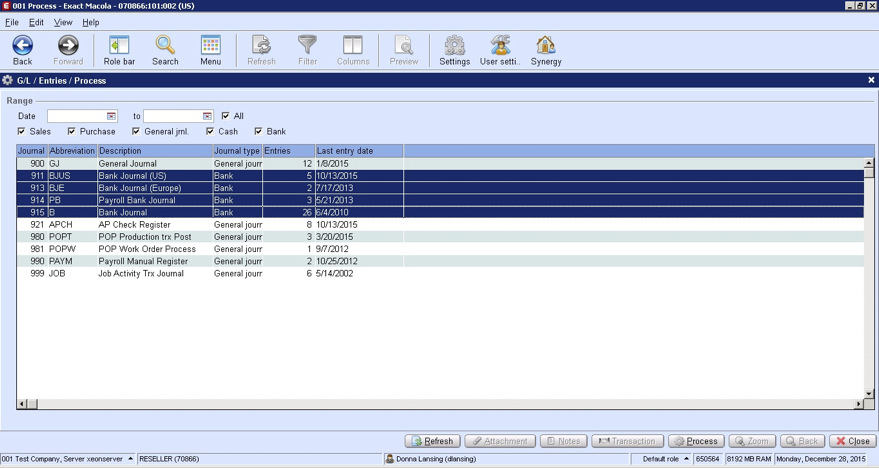
3. Process all bank journals
- Go to G/L > Entries > Process > highlight bank journals > click Process
Tax Codes Year-end Checklist
Tax Code Steps:
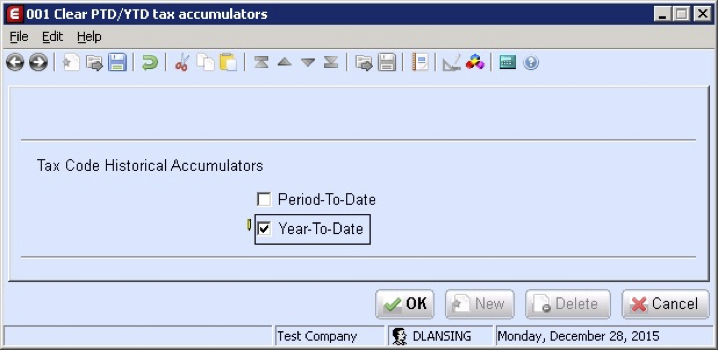
1. Run Clear Tax Accumulators.
- G/L > Taxes > Clear PTD/YTD tax accumulators
- Specify only “year-to-date” accumulators.
General Ledger Year-end Checklist
General Ledger Steps:
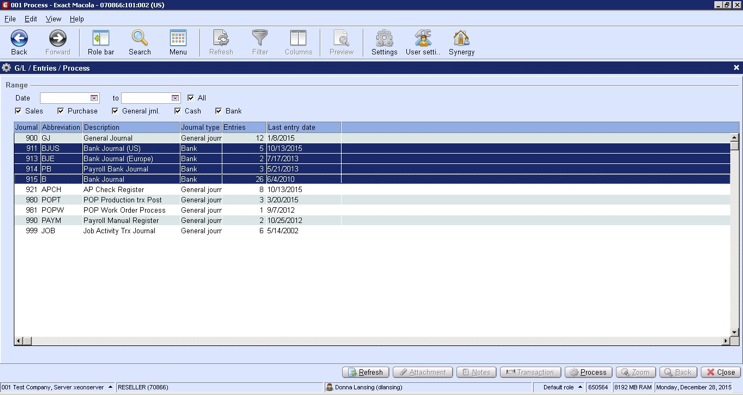
1. Process all remaining journals
- Go to G/L > Entries > Process > highlight journals > click Process
System Closing Checklist
Closed Periods Steps:
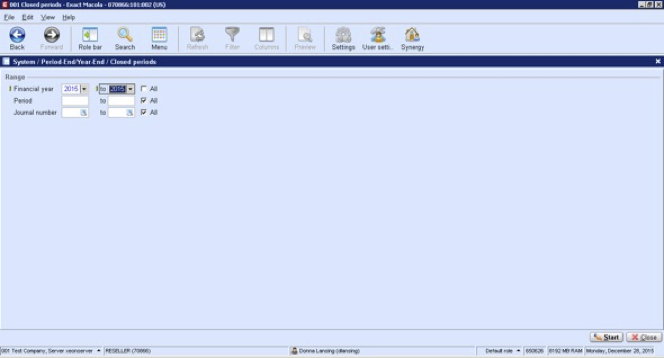
1. Close all journals for the closing year
- Go to System > Period End/Year End > Closed Periods
Profit / Loss Steps:
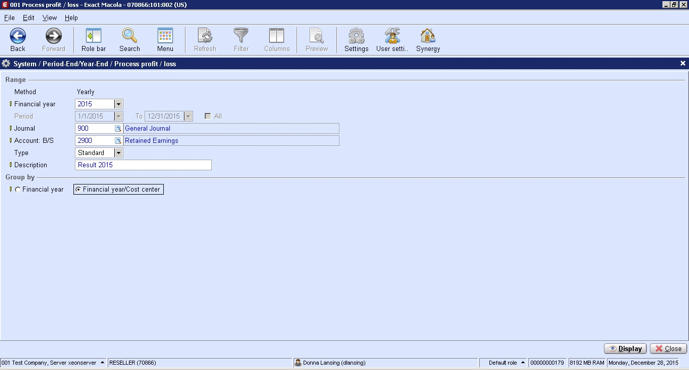
1. Complete Period-end checklist.
2. You will need to REOPEN the closing year journal that will be used to process profit/loss.
3. Process Profit/Loss.
- Go to System > Period End/Year End > Process Profit/Loss
General Ledger: Final Steps Year-end Checklist
General Ledger Steps:
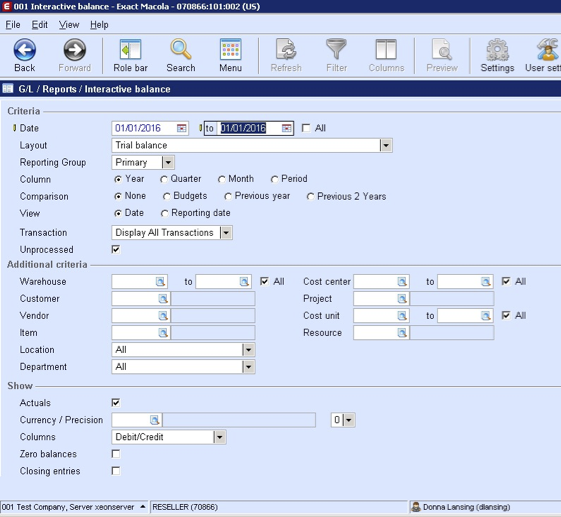
1. Run Interactive Balance Reports
- Go to G/L > Reports > Interactive Balance
- To verify that all has been done correctly, print an interactive balance report with a starting and ending date of the last day of your closed year. Assure that the ending balances are what you expected.
- Additionally, print an interactive balance report for the first day of your new year. Assure that ALL of your income and expense accounts beginning balances are zero. Also, assure that your balance sheet beginning balances are the same as the ending balances from the step above
- For both of the above reports, be sure to not check the “Zero Balances” checkbox so only account with activity will be printed.
